


Table of contents
What's Up? In this series of articles, I will be documenting the basics of building vulnerable machines. Machines you can submit to HTB, THM, Offsec UGC, etc. As the series gets deeper, we will start configuring more complex services and vulnerabilities.
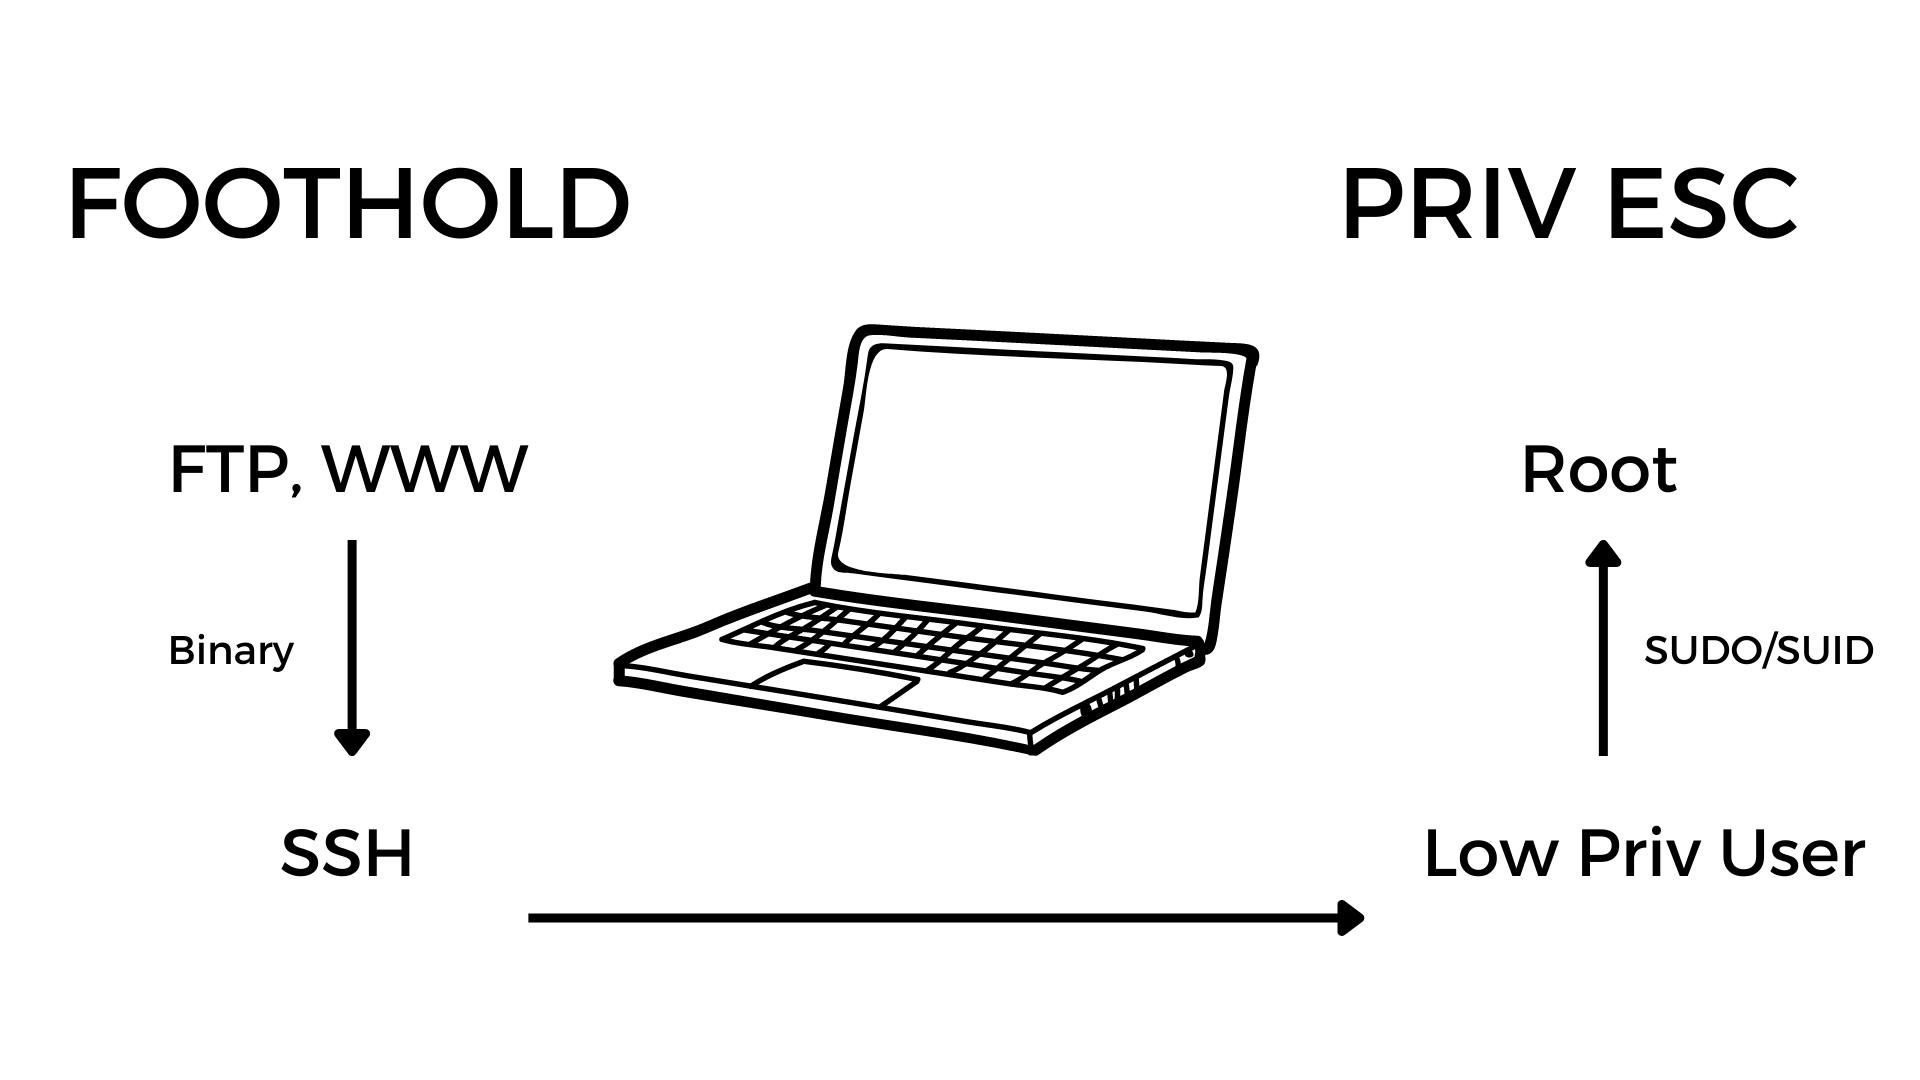
With our first machine, we learn how to configure and exploit the following technologies and services:
FTP, SSH, Apache2
32 Bit LSB Binary Exploitation
Misconfigured SUID Binary
SUDO Privileges
We will be building our machines with VirtualBox and Vagrant. So for whatever operating system you are currently using, get both of those installed and follow along.
Getting Started With Vagrant
The video related to this part can be found here
This lab build will be done using vagrant and virtualbox on a windows host. You can download vagrant here and virtualbox here. The installation is pretty simple so get that done.
Make the directory you would like to work in and initialize it with vagrant. You can pick whichever version of Ubuntu you would like to use, but in this case we will be using Ubuntu 18 which is Bionic64.
To initialize the working directory you can run vagrant init ubuntu/bionic64. Here is a list of a couple of vagrant commands that may come in handy.
Vagrant commands
vagrant init: initialize the directory and generate vagrant files
vagrant up: spin up the virtual machine
vagrant ssh: ssh into the new created virtual machine as the vagrant user
vagrant halt: shut down the machine
vagrant destroy: destroy the virtual machine
Open the entire directory using the desired text editor of choice. The Vagrantfile is the main configuration file that we will be working with. It is initially full of a lot of random things which I remove and use the following template:
# -*- mode: ruby -*-
# vi: set ft=ruby :

Vagrant.configure("2") do |config|

  # Box Settigs
  config.vm.box = "ubuntu/bionic64" # machine image
  config.vm.hostname = "naruto" # hostname

  # Provider settings
  config.vm.provider "virtualbox" do |vb|
  # vb.memory = 3048
  # vb.cpus = 2
  end

  # Network Settings
  # config.vm.network "forwarded_port", guest: 80, host: 8080
  # config.vm.network "forwarded_port", guest: 80, host: 8080, host_ip: "127.0.0.1"
  config.vm.network "private_network", ip: "192.168.56.10" # this gives it a static IP to work with
  #config.vm.network "public_network"

  # Folder settings
  config.vm.synced_folder "./data", "/root/data", :mount_options => ["dmode=777", "fmode=666"]

  # Provision settings
  # config.vm.provision "shell", inline: <<-SHELL
  #   apt-get update
  #   apt-get install -y apache2
  # SHELL

  config.vm.provision "shell", path: "./data/install.sh"
end
Create a directory and name it data. This is the directory we will be using to house our installation script and any other scripts or binaries we may want to move to our newly created VM. It will be mounted to /root/data of the newly created VM, and the contents copied to their respective places and root/data will be deleted. All this will take place at a later stage.
The line config.vm.provision "shell", path: "./data/install.sh" specifies our installation script in which we will put all our installation commands. So create the file install.sh in the /data directory you created.
All of these files and directories we are creating are on your local machine
After creating the install.sh file, enter the following contents into it.
# installation commands for the vulnerable machine naruto
# do not run this machine in your local network without monitoring it

echo -e "\e[1;31m updating repos \e[0m"
apt update

echo -e "\e[1;31m installing apache \e[0m"
apt install -y apache2
Save the file and run the command vagrant up to spin up a new VM and it will have Apache2 running on it. This can be confirmed by visiting the given IP address 192.168.56.10 in the browser.
The trick with the installation script is to first ssh into the created VM and run whatever command you want to add to the script on the machine first. If it works without any problems then we add it to the script. This will save time when spinning up the machine each time you destroy it.
Take note that this article will continually be updated as the YouTube playlist gets longer